Creating a New Form
The screen you use to create a form follows five simple steps. After completing the steps, you have a new form that’s ready to collect the information you need. To make the task easier, Ektron CMS400.NET provides sample forms that you can start with then customize.
As explained in Mailto or Database Form, form data can be emailed and/or saved to a database. Forms created using the procedure described below are saved to a database by default, but not emailed. To change either setting, use the Edit Properties screen. See Editing a Form’s Properties.
Procedure for Creating a Form
To create a new form, follow these steps.
Note: You can also create a new edition of a form in another language by copying an existing form and translating it. For more information, see Translating Content to Another Language.
Note: For the steps to create a new poll, see Working With Polls. For the steps to create a new survey, see Creating a Survey.
1. Consult with your Ektron CMS400.NET administrator about the folders in which you should create forms. See Also: Forms Must Use Template with FormBlock Server Control
2. From the View menu, click Language, and select the language in which to create the form.
3. Click New menu > HTML Form/Survey.
4. The New Form screen appears.
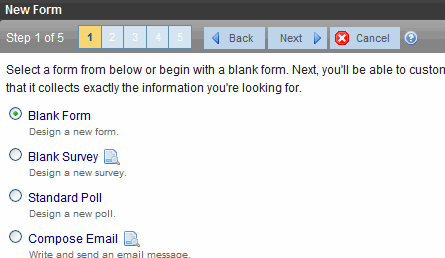
Note: When you choose Standard Poll or Blank Survey, the number of steps in the Forms Wizard changes from five to four. This happens because the Assign Tasks step is removed. See Also: Working With Polls and Creating a Survey.
5. Choose the form that you want to begin with. You can click preview ( ) next to any sample form to see it before choosing it.
Select a sample that most closely matches the form you want to create. After you create it, you can add fields, remove fields, modify possible responses, etc.
6. Click Next.
7. Enter or edit the form’s Title and Description.
Title - used to reference the form within the Workarea (required)
Description - an extended description of the form
8. The next screen lets you assign a task to a user or user group. If you do, a task will be created every time a site visitor submits this form. See Also: Assigning a Task to a Form
9. A new screen lets you determine what happens after the site visitor completes the form. The choices are:
Display a message - See Composing the Postback Message
Warning! If your form/survey/poll uses either Redirect option, your Web developer must use a FormBlock server control to display this form on a Web page. He cannot use a Poll Server Control when redirecting to an action page.
Redirect to a file or page - Identify a file or a page on your Web site that is launched when the visitor completes the form
- An example of a file is a white paper (a common file format is .PDF) that a visitor requested
- An example of a page is one that prompts the visitor to download your product
Redirect to form data to an action page - See Redirect to an Action Page and Forward Form Data
Report on the form - See Making Form Results Available to Site Users
10. Now that you have completed information about the form, you can enter the form’s content. This procedure is described in Creating a Form’s Content.
Composing the Postback Message
The postback message can contain text or graphics, just like any other HTML content. Typically, it acknowledges a site visitor’s completion of the form.
For most sample forms provided, sample text appears in the editor. Modify it as you wish, using Ektron CMS400.NET’s editor to change the style sheet class, insert library items, etc.
Inserting Fields into the Postback Message
You can also insert fields into the Postback Message that retrieve form information. For example, your postback message may be
Thank you «Full Name» for completing the «[Form Title]».
When the postback message appears, it looks like this.
Thank you Jay Kohler for completing the breakroom survey.
When you click the Post back message tab and select Display a message, the Merge Field button (
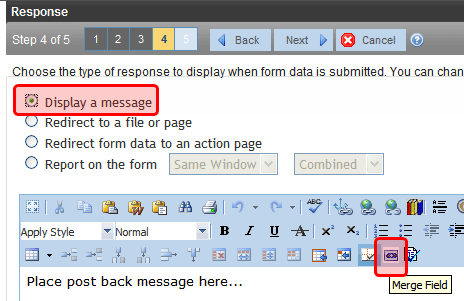
When you click that button, a dialog like the one below appears.
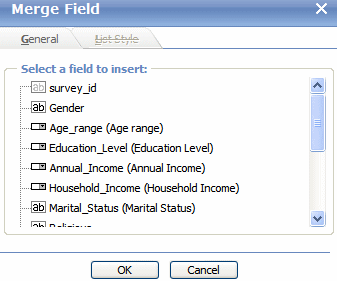
All form fields appear on the list. In addition, the list includes the following fields, which can retrieve form information into the postback message.
Form title
Form description
Date submitted
Redirect to an Action Page and Forward Form Data
Redirecting Submitted Form Data explains how your administrator sets up the action page. After your administrator follows that procedure, he identifies a folder and hyperlink that you use to select an action page.
Warning! You must have the folder and hyperlink name from your administrator to complete this procedure.
To redirect submitted form data to an action page, follow these steps.
1. Go to the page on which you determine the form’s response. If this is a new form, it is page 3 of the Forms Wizard.
To modify an existing form, select the form’s folder, then the form. Next, select Edit and click the Post back message tab.
2. Select Redirect form data to an action page.
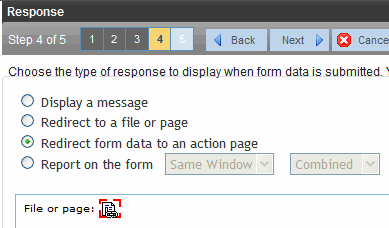
3. Click the icon next to File or page.
4. The Hyperlink Manager dialog appears. Click URL.
5. The library appears. In the left panel, select the folder that contains the hyperlink.
6. In the right panel, select Hyperlinks from the file type dropdown.
7. Select the hyperlink whose name was given to you by your system administrator.

8. Click Insert ( ).
).
Making Form Results Available to Site Users
When you create polls and surveys, you can choose to display the results after a site visitors completes the form. The results can display in the same window or a new window. In addition, you can choose how to chart the data. For a description of chart types, see Chart Types.
To show site visitors poll/survey results, follow these steps.
1. Go to the page on which you determine the form’s response. If this is a new form, it is page 4 of the Forms Wizard.
To modify an existing form, select the form’s folder, then the form. Next, select Edit and click the Post Back Message tab.
2. Select Report on the form.

3. Choose whether you want the results to appear in the Same Window or a New Window.
4. Choose the style of the report.
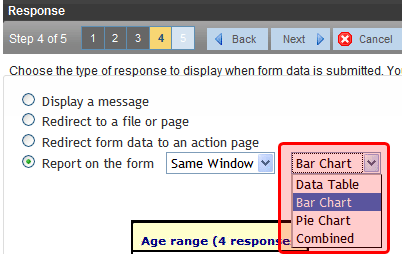
Chart Types
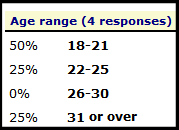
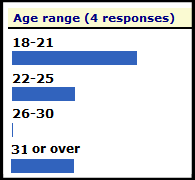
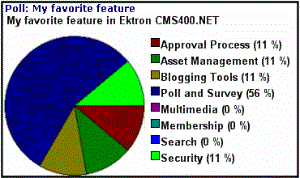
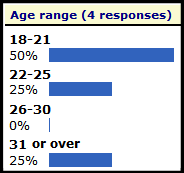
The following table describes the types of charts available.
|
Description |
Sample |
|
|
Data Table |
The poll or survey answers are displayed with the percentage of users who responded to each item. |
|
|
The poll or survey answers are displayed with a bar graph. Use this chart type when you want a quick visual representation of the responses. |
|
|
|
Pie Chart |
Displays a standard pie chart. Poll or survey answers are color coded, and the percentage of people who chose each answer is shown. |
|
|
Combined |
Combines the Data Table and the Bar Chart. |
|
Warning! You cannot chart data entered into a text box. For example, if one choice in a poll is Other, and the survey has a text box for site users to enter additional information, the text in the box is not charted. However, the fact that a user chose Other is charted.
See Also: The Structure of Form Data
